Table of Contents
TL;DR
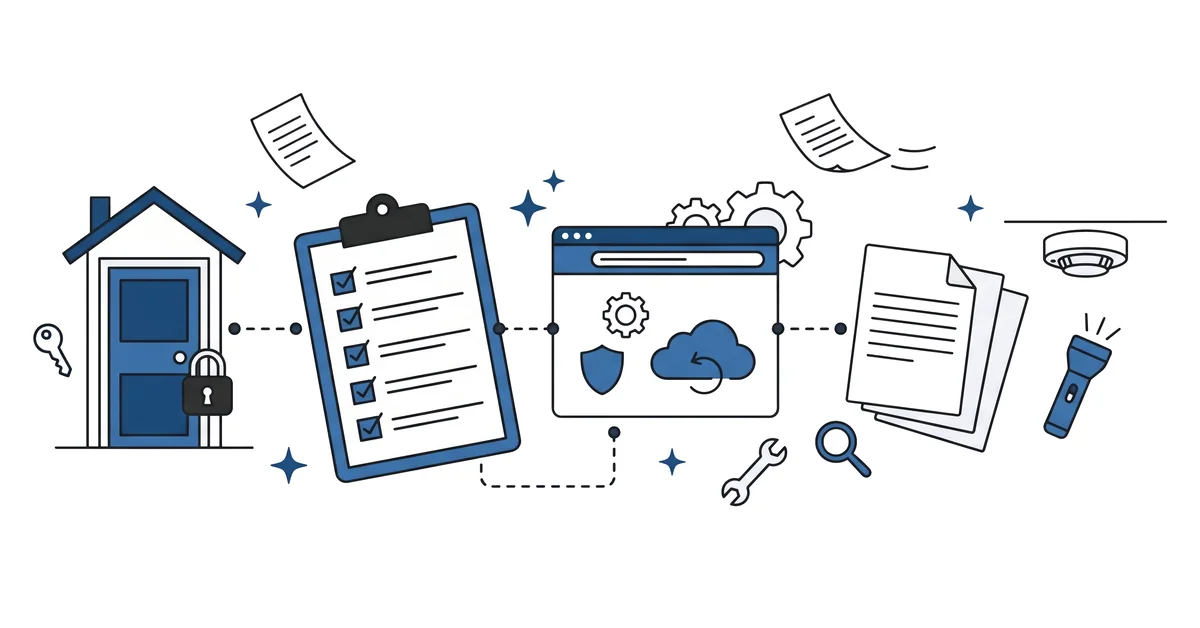
- The first hour after installing WordPress sets defaults that compound for the rest of the year. Permalinks, Discussion, Reading, Privacy, and General settings — five screens, two minutes each. The five together are the spine of every later setting.
- Four security pieces sit in the day-one hardening baseline. A strong unique admin password from a password manager. Two-factor authentication on the admin account. A login-attempt limit. Auto-updates enabled for core and trusted plugins. All four are settings, not code.
- Three plugins install on day one — backup with off-site storage, security or 2FA plugin, search-and-AEO plugin. Three can wait — caching, spam filter, page builder. The wait list saves the year-long performance bill that starts on day one with fifteen plugins.
- The backup test is the part most beginners skip. A backup you have not restored once is a backup that may not exist when you need it. Run one restore on a staging copy before the first published post.
- Five day-one anti-patterns. Installing fifteen plugins. Picking a theme before there is real content. Importing demo content. Buying a paid speed plugin. Forgetting to uncheck "Search Engine Visibility — discourage." The last one has hidden many small business sites for months.
The fresh wp-admin dashboard opens. The "Hello World" post sits at the top of the Posts screen. A "Sample Page" link in the menu. The Plugins screen shows two plugins you did not choose — one from the host, one from WordPress itself.
A small voice in your head says "I will get to all of this later." Later usually means never. The defaults you do not change today become the defaults the site runs on for a year.
This piece is the post-install checklist for a small WordPress site in 2026. About ninety minutes of work, done once, in order. The first hour saves the next year of small fixes.
The "thirty things you must do after installing WordPress" listicles are saturated, performative, and mostly wrong. The irreducible list is closer to fifteen, grouped into five tasks. The grouping is the part that makes the checklist runnable in one sitting.
Why does the first hour after installing WordPress matter?
Day one decisions show up for the rest of the year.
The Permalinks setting you do not change becomes the URL structure every page inherits. Switching it later breaks every existing link to the site. The cost of the wrong choice grows every week.
The default discussion setting you leave on becomes the comment-spam pile you scroll through every Monday. The half-hour you save on day one becomes a half-hour every Monday for fifty Mondays.
The "Hello World" post nobody deletes ends up indexed by the answer engines six weeks later. The site shows up in a Perplexity citation with a placeholder title. The body reads "this is your first post." The first impression is the impression.
None of these decisions is big on its own. The cost is in the compounding. A clean first hour saves a year of small fixes you would not have planned for.
What are the five settings to change before you publish anything?
Five settings live in the Settings menu. Five is the irreducible list.
General. Site title, tagline, admin email, time zone, date format. Two minutes.
The site title shows up in every browser tab and every social-card preview. The default tagline — "Just another WordPress site" — has shipped to the answer engines on more sites than anyone wants to count.
Permalinks. Post-name structure. Set it once and never change it. Anything other than post-name is a URL the engines will not love and a renaming exercise the site will pay for later.
Discussion. Turn off comments on pages. Hold the first comment by every author for moderation.
Ban known spam keywords. The defaults are 2009-era assumptions about a Web that no longer exists.
Reading. Set the homepage to a static page or to the latest posts. Set the search-engine-visibility checkbox correctly. The mistake hidden in this screen is the "discourage search engines from indexing" box left checked from a staging install — a real category-five mistake.
Privacy. Generate the privacy policy page. Edit the placeholder text.
Link it in the footer. The privacy page is required in most jurisdictions. The placeholder is not a privacy policy.
Two minutes per setting. Ten minutes for all five. The five together are the spine of every later setting.
Which security baseline do you set up before the first plugin install?
Four pieces. All settings. No code.
A strong unique admin password generated by a password manager. The password the site shipped with is not yours. The password you set during install was probably weaker than the password manager would have generated. Generate a fresh one and store it in the manager.
Two-factor authentication on the admin account. A 2FA plugin from the WordPress directory or a Cloudflare-style gate at the network edge. The 2FA habit closes the most common opportunistic attack on a small WordPress site.
A login-attempt limit. Five attempts, fifteen-minute lockout, IP block escalation. The login-limit plugin handles this.
Some hosts include it at the server level. Either works — the goal is the limit, not the specific tool.
Auto-updates enabled for WordPress core minor releases and for plugins on the trusted-author list. Auto-updates are the difference between a patched site and a vulnerable one. The trusted-author list is the small set of authors whose plugins you trust to ship a clean update.
The four pieces close most of the opportunistic attacks a fresh small business site sees. The full small-site security walkthrough lives in the WordPress security checklist for small websites. The four-piece day-one baseline above is the entry point.
Which plugins are safe to install on a fresh site, and which can wait?
Three install on day one.
A backup plugin with off-site storage, thirty-day retention, and a self-serve restore button. The plugin choice matters less than the off-site destination and the restore test.
A security plugin or 2FA plugin that handles the login-attempt limit and the two-factor habit together. One plugin is enough — do not stack three.
A search-and-AEO plugin so meta titles, meta descriptions, and structured data are populated from the first post. The plugin handles the on-page surface that the answer engines and search engines both read.
Three can wait until you actually need them.
A caching plugin. The host’s caching covers most cases on a fresh small business site. A wrong cache plugin on day one breaks the block editor preview and confuses the next month of debugging.
A spam filter. The Discussion settings handle the first month. Install the spam filter when the first wave of bot comments arrives, not before.
A page builder. The block editor and the Site Editor handle most layouts in 2026. Install a builder only after the editor proves insufficient for one specific layout you cannot achieve with patterns.
The discipline is the public-record check on a WordPress plugin for every install, day one and beyond. Three installs on day one keeps the bill manageable, and ten installs on day one starts a year-long debugging tour.
How do you set up backups before you publish your first page?
Three steps.
Install a backup plugin with daily off-site backups, thirty-day retention, and a self-serve restore button. The named players in 2026 — UpdraftPlus, BlogVault, Solid Backups, Jetpack VaultPress — all meet the bar. Pick on price and UI fit.
Connect the off-site destination. Google Drive, Dropbox, Backblaze, or the host’s S3-compatible bucket. Off-site means stored on a different server than the site itself. A backup on the same server is a snapshot, not a recovery plan.
Run one backup manually and test the restore. Use a staging site or a local copy. Verify the restored site loads.
Verify the database connects. Verify the uploads are present.
The test is the part most beginners skip. The test is the difference between having backups and having a recovery plan. A backup you have not restored once is a backup that may not exist when you need it.
How does AI help you finish the post-install checklist faster?
A chat reads the dashboard for you.
Paste the Settings General screen text into a chat. Ask whether anything is missing or set to a 2026-out-of-date default. The chat names the tagline, the time zone, the date format, the admin email pattern. The read-back takes one minute.
Paste the Discussion settings and ask whether comment spam is likely with this configuration. The chat reads the avatar settings, the moderation rules, the keyword ban list. The chat names the gap. You click the box.
Paste the auto-installed plugin list and ask whether any of them are unmaintained or known to slow the editor. The chat reads the names against the public record and surfaces the ones with stale change logs.
A chat does not click the boxes for you. A chat reads the screens faster than you will. The chat surfaces the defaults that became defaults years ago and have not been reset since. Ten minutes of read-back saves an hour of reading the screens yourself.
What should you NOT do on day one?
Five anti-patterns.
Installing fifteen plugins because a listicle said you need them. The year-long performance bill starts here. Three on day one is the discipline. Ten is the year of slow-page debugging.
Picking a theme before you have a single page of real content. The theme always looks wrong without content. Pick a default theme.
This trap bites freelancers hardest, because the work itself is the content. The portfolio looks empty until a few real projects fill it. The guide to building a freelancer portfolio site puts the projects first and the theme second. Write the case studies, then choose the frame.
Write three real pages. Then pick a theme. The order matters.
Importing demo content. The demo posts get indexed by the answer engines. The demo URLs leak. Cleaning them out takes an afternoon and the wrong cleanup leaves orphan database rows behind.
Buying a paid speed plugin. The speed problems on a fresh site are usually image weight, not server response. The paid plugin solves a problem you do not yet have, and a wrong cache plugin on day one breaks the editor preview.
Forgetting to uncheck "Search Engine Visibility — discourage search engines from indexing this site." A real category-five mistake. The checkbox lives on the Reading screen. It is on by default on staging installs and gets carried into production by busy hands.
The site stays invisible to Google for months. The fix is one click — the cost of forgetting is a quarter of search traffic.
How long should the post-install checklist take you?
About ninety minutes. Done once. In one sitting.
Twenty minutes for the five settings. Twenty for the four-piece security baseline. Twenty for the three day-one plugins and the backup test.
Ten for the AI dashboard read-back. Twenty for the cleanup — delete "Hello World," delete "Sample Page," set the favicon, write a placeholder About page.
The hosts that promise "one-click WordPress install" deliver the install in thirty seconds. The ninety-minute setup is the part you still have to run yourself. The fresh install is the only moment in the site’s life when the checklist takes ninety minutes. After the first published post, every change costs more.
Which task on the post-install checklist did you skip?
Pick the one task you would not have read carefully on a Saturday morning at hour three of a fresh-install setup.
Permalinks. The privacy policy edit. The 2FA plugin.
The backup restore test. The "discourage search engines" checkbox.
Each one is a five-minute fix today and a much longer fix three months from now. The five-minute version is the version you should run before the first published post. The three-months-later version costs broken links, a missing privacy policy, an unprotected admin login, an untested backup, or a site invisible to search.
The post-install checklist is one of the few WordPress moments where the order matters. Run it once, in order, and the rest of the year is mostly content work.
Other questions worth answering
Why does the default administrator username deserve a separate hardening step from the password?
Because brute-force authentication walks the username before it walks the password. Brute-force sits among the seven recurring attack patterns on a small WordPress site in 2026. Rename the account the same hour you set up the password manager, or create a fresh admin user and delete the original.
Should beginners stay on the Classic Editor or move straight to block-based authoring?
The block editor is the right default in 2026, unless you have a real reason to stay on Classic. WordPress 5.0 (December 2018) made it the editing default, and the Site Editor extended it to full-site templates in 5.9 (March 2022). Those two together cover most beginner publishing needs without a page builder. Classic Editor remains a maintained fallback.
Where do WPScan and Patchstack fit in your pre-activation evaluation routine?
Two free vulnerability databases sit between the install button and your live site. WPScan and Patchstack both track CVE disclosures by plugin slug and version. Most WordPress compromises trace to plugins or themes rather than core in 2026. Searching the candidate name on both takes about 5 minutes.
When does staging stop being optional for a solo operator?
The same week the first plugin update lands. A backup nobody has restored is not a recovery plan, and the cheap place to test that restore is a staging clone. Managed hosts like Kinsta, WP Engine, and Pressable ship one-click staging in 2026. Setting one up takes about 10 minutes and pays for itself the first time an update breaks the editor preview.
Which task did you skip on your own install?
Just installed WordPress and cannot remember whether you ran the backup test or unchecked the "discourage search engines" box? You can contact me here. Tell me what the site is and how recently the install went live.
I will walk through the five settings, the four-piece security baseline, and the day-one plugin list, and name what probably stayed un-run. There is no pitch, no upsell, and the conversation is free.